
Hello Piloteers!!
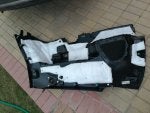
This is my first post. I hope I can convey my question properly. Few days ago I had an unfortunate event here my new Honda Pilot 2016 EX AWD slightly got brushed with the edge of the wall at the passenger rear end. It left a small dent with crease on the metal body just behind the subwoofer area, right above the plastic bump edge. Bumper also go some scratched but no other damage.
The dent is not very bad so can be pushed out from inside. As the color is black it is not easily eye catching but still want to make it better.
I am looking for instructions on how I can remove right side cargo interior panel. I have tried to follow the forums discussion replacing subwoofer, but the information was I was getting was not enough.
I really appreciate your help!! I enjoy reading posts on this forum")
This is my first post. I hope I can convey my question properly. Few days ago I had an unfortunate event here my new Honda Pilot 2016 EX AWD slightly got brushed with the edge of the wall at the passenger rear end. It left a small dent with crease on the metal body just behind the subwoofer area, right above the plastic bump edge. Bumper also go some scratched but no other damage.
The dent is not very bad so can be pushed out from inside. As the color is black it is not easily eye catching but still want to make it better.
I am looking for instructions on how I can remove right side cargo interior panel. I have tried to follow the forums discussion replacing subwoofer, but the information was I was getting was not enough.
I really appreciate your help!! I enjoy reading posts on this forum