Honda Pilot - Honda Pilot Forums banner
21 - 40 of 48 Posts
Anyone else had this happen? The leather over the front seat console cover has started to separate on my 2009 Touring. It started as a small bubble, then a second bubble, then the bubbles connected into a long and longer area. It's about a 3/8 inch wide and 2 inches long.

Since I'm out of warranty I guess I'll remove the cover and take it to an upholstery shop.
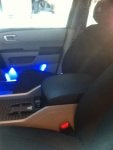
Mobro, I replaced my center console cover with an actual black leather piece I bought on ebay. Results were great and easy to do. Here is a pic so you can see.
 

Attachments

I just ordered arm rests and center console piece myself.
 
Discussion starter · #23 ·
That looks nice Joe. I ended up buying a replacement a few years ago. so far so good. It started bubbling at about 45,000 miles of my arm resting on it. It was completely shredded withing a few months. The replacement has been good so far. I'm at 155k now. But the door arm rests have disintegrated! I wonder if you have to get the whole door panel or just the "leather" parts.
 
You can buy just the PL-leather parts at the dealer
I ordered real leather pieces on ebay for less than $40.
 
That looks nice Joe. I ended up buying a replacement a few years ago. so far so good. It started bubbling at about 45,000 miles of my arm resting on it. It was completely shredded withing a few months. The replacement has been good so far. I'm at 155k now. But the door arm rests have disintegrated! I wonder if you have to get the whole door panel or just the "leather" parts.
mobro, you can order just the door arm rests only. No need to order the entire door panel. I exchanged my original grey door arm rests for the black ones from a totaled 2013 Pilot. But I actually looked up the part number on HondaPartsDeals.com. But Bernardi Honda has them two.
 
I doubt its actually leather. Betcha its pleather aka Vinyl.
Rocky is correct it isn't leather. I had mine replaced with actual black leather piece I found on ebay. Took it to a upholstery shop and for 12 bucks they secured it on my center console. It looks great and cost was minimal. I believe there is a prior post I made on this subject with some pics.
 
Fixed my 2010 Touring 2WD today. Genuine leather console cover cost $18.99 from ebay: Gray Real Leather Console Lid Armrest Cover Fits 09 13 Honda Pilot | eBay

I watched a few videos on YouTube to develop a plan of attack and went to the Ace Hardware in town and bought some Loctite Pro 300 Heavy Duty spray adhesive. I had my wife help me so we could stretch and apply pressure from opposing sides. It came out great!

To remove the console cover, there were four screws on the underside; it resisted coming off, so I gently pried the cover apart from the lid with a wooden stick (about the size of a Popsicle stick but thicker). It then exposed the four screws attaching the hinge to the lid.

The leather cover comes folded up, so I used my clothes iron on the linen/steam setting to iron out the creases from the back side of the cover (I didn't want to apply the hot iron to the finished surface). As another member mentioned, you remove the old cover by prying out about a hundred staples. The can of Loctite advises using a double coat of adhesive on porous surfaces, and that's what I did. I sprayed it on nice and heavy. Next I'm going to research what it's going to take in terms of labor to replace that nasty vinyl they put on the door armrests that have the same issue.
 
If you have a set of spring clamps, I would advice digging them out before you glue on the leather cover. I will make it nice and tight, especially where you have to fold under the double-stitched French seams. I only could find one of our clamps, and I wished I had at least four of them.
 
Its a shame that such cheap material is used on a car that cost so much!

I was thinking the same thing! The 2011 is my second Pilot (the first was a 2003; this is my fifth Honda purchased new). The "leather" on the two front armrests, the console cover, and now the door itself are bubbling and wrinkling. The vehicle has been lightly used and well-maintained - no climbing kids, usually a one-person commuter, yet the problem started when the car was less than three years old. Have always loved Honda, but they really disappointed me on this one!
 
I did a quick search and found a supplier that makes a leather replacement for the center console and will be replacing mine this weekend.


Nothing different than what I've experienced with GM and Ford with the console cover separating. Glad there is a leather replacement to do it right. Cost was about 20 bucks.
 
I completed the recovering of my center console on Sunday. A few things learned along the way that may help others out:


1. use a small screwdriver to get under the factory staples and pop them loose.
2. the replacement leather, although it looks like it will go on either way, only goes on one way. Do a test fit and mark with a pen or pencil on the underside of the leather where it lines up with the plastic cover.
3. the leather replacement came folded in a small envelope. Unfold and set in the sun for a couple hours to relax the seams out of the material and make it more pliable.
4. Get your new staples as far up in the lid as possible so they do not interfere with the bottom cover when you put it back together. A smaller upholstery stapler would have been nice, but not necessary. I used an Arrow T55 with T50 heavy duty 1/4 staples.


I used a spray on glue to help adhere the leather to the cover along with 1/4 inch staples in the underside. The plastic is extremely thick so there is no worry about shooting one through the cover. Center the side seams and tack in the middle of one end (I started with the back of the cover). Get it stretched out so the leather sits flat and tack to the end. Set the cover against a hard surface (table covered in cardboard) to let you seat the staple in the plastic. Pull the leather back and spray the adhesive on the cover and underside of the leather.


At this point, the adhesive needed to sit for a minute to dry to the point of being tacky. Take your time and stretch the leather evenly as you work your way over the lid. Make sure your seams are even and when you get half way down, put in a couple staples on either side to hold the leather. Check to make sure the surface is tight and wrinkle free. Put a staple in each corner to hold the seam even on the top before pulling the end, folding it over and stapling it in.


Pressing the corners where the stitching wraps over against a hard surface while pressing on with the staple gun helps to pin them in place. Continue around the circumference of the lid and staple the leather down. I used a razor blade to cut out around the plastic on the lid to get a tighter fit.


That's it. Reinstall the latch, hinge and bottom plate and you are done. Total time for me excluding the trip to Home Depot for staples and glue was around 1.5hrs. Had I done upholstery work before, I could have saved around a half hour. I had contemplated just going over the vinyl with the leather but was worried about the thickness and the vinyl coming off. Once I pulled all the staples and pulled the vinyl, I was able to see that the top layer had separated from the bottom which was still glued to the lid. The leather is a bit thicker so you will have to work the bottom cover back in a bit when reinstalling it.


Tonight I clean the rest of the interior....
 

Attachments

No it does not. The texture is a bit rougher and the color is slightly off being a bit darker. I have not had the opportunity to clean the rest of the leather as of yet. Too many kids games on weekends. I'm hoping with time, sun and some leather conditioner it may match the rest of the interior better.
 
Just replaced the vinyl with a leather cover bought on ebay for about $20. Color match wasn't perfect (a warmer shade of gray), but close enough.

To replace:

1. Remove four screws holding underside cover of the console lid in place, and pry the cover off gently.

2. Remove four screws attaching the lid to the console hinges and remove the console lid.

3. Remove two screws attaching console lid latch and remove the latch.

4. Remove the numerous staples holding the vinyl on to the console lid using a small screwdriver, staple remover, or putty knife.

5. Gently peel away the vinyl from the console cover foam, being careful to not damage the foam (mine peeled off quite easily).

6. Place the leather cover over the console lid, making sure it's on in the correct direction—one end has a more pronounced curve—and align the cover so that the seams align with the edges of the console lid.

7. Staple the leather cover to the console lid, beginning at the center of the sides with the seams, working your way from the center outwards, being sure the seams align with the edges. Keep staples away from edge so that they don't show once you replace the underside lid cover. I used an Arrow T50 stapler with 1/4" heavy duty staples. A pneumatic upholstery stapler with an extended nose would have worked better at getting in the tight spaces on the lid.

8. Trim any excess leather away with a sharp utility or Exacto knife, or single edged razor blade.

9. Reassemble the lid and attach it to the console in the reverse order you removed it.

Total time: 45 minutes to an hour.

Someone else suggested taking the leather cover and console lid to an upholstery shop and have them attach it. I would probably do this if I didn't have the tools, the gumption, the patience, the time, or the skill necessary to do the job. Think they said they paid $20. So, for between $20–$60, you can have a console cover that's better than the original and cheaper than the cost of a new one.
 
Ended up doing another console cover this time for my neighbor's 2007 Pilot. They opted to use another piece of vinyl they picked out at a fabric shop. On the 07 the padding layer completely disintegrated when the top surface was removed which added one extra step. After scraping off the remaining padding with a putty knife, we installed new dense foam padding around 1/4" thick using the spray adhesive. Trimmed to the lid once dry and the installed the vinyl over the top. All in all we spent an hour on this one. Results were good and they are happy.
 
quick fix

Bought a used 09 pilot a few weeks ago. The center console lid had 4 bubbles on it. Black interior. I took the lid off, took an iron and put it on low to medium heat. Tried first with an towel over it but it wasn't transferring the heat that well. Said what the hell and slowly touched the iron over the bubble briefly maybe a second worth didn't do anything. So I continued pressing on it briefly and removing until it started to shrink and lay flat. Fixed it perfectly. The last bubble was a little tricky. Looks almost perfect. You can see the creases from the edges of where the bubbles started but it otherwise is pretty good. Cleaned and conditioned it. We will see if it lasts.
 
21 - 40 of 48 Posts