Honda Pilot - Honda Pilot Forums banner

Just got a previously-loved 08 Pilot EX-L with 129k on it!

32K views 199 replies 18 participants last post by  undivide  
#1 · (Edited)
Howdy howdy,

If you saw my last post about the creampuff, the mother-in-law didn't want to make a deal, so continued the prowl for a used, and well loved Honda Pilot. After finding out the 03-05's don't have the side curtain airbags to the 2nd & 3rd row, narrowed my search down to the 06-08's. After not finding anything up to my standards via AutoTempest, decided to try the craigslist side of things, and probably after about 5 minutes of looking, stumbled across a 08 EX-L, with Steel Blue Metallic Paint, non-Navigation with under 129k on it. After going through the Popular Mechanics 101 used car checklist on it, everything checked out, and looked in order. Only red flag was an unknown timing belt, with second fault being the front tires probably have 30% tread left, but rears are new. Asking price was $6995, I offered $6500, and then met in the middle at $6750, at a place called Car Connections in Modesto. I then drove it the 2.5 hours home (112ish miles) no issues. Thing is "loaded" with options/accessories too. Has an after-market RES system for the back seat (will be great for my 8 year old if he isn't distracted by a different screen in his face). It has the auto-dimming compass mirror installed, Door edge guards, Floor Mats, Steering Wheel Cover (and even came with a two sets of headphones in the backseat, and the previous owner left their sunglesses in the roof holder). It apparently also has a KARR system in addition to the factory immobilizer, and lojacked to boot. To top things off, I just went through the CarFax and called all the places it was serviced, and found out at the one entry that listed "Motor mount(s)", that they had also done the Timing Belt and Water Pump along with the Front & Rear Mounts only 1200ish miles previously! (Yes, I did a major happy dance, hahaha) The wife is ecstatic at the price (since she will be paying for it), and is more than happy with everything (especially now). Thing pulls nicely, rides straight, and drives smooth.

Only thing is, it looks like it had the running boards / side-steps that I suspect got stolen off it (since the crime in that area is exceptionally high, and further backed up by the second alarm & lojack), so will probably grab a used set from a junkyard or something, and slap them on.

Any other flaws are either things that are things that I can easily resolve with a little elbow grease here and there.

The only other things I noticed, and figured you would be the perfect people to ask, is that on medium-heavy braking there is a sensation through the brake pedal I can feel, back of my head is thinking possibly slightly warped rotors, but then I realized I've never really driven a vehicle with VSA / Traction Control, and am wondering if that feedback I'm getting in my foot might be attributed to them activating? (This car did live in an area that could be considered "desert", so increased temperatures on everything vs here in Monterey could cause some extra stress on the rotors if the previous owner didn't keep good following distance / ride the brakes).

Also, for the Heater Control System, it seems like the blower doesn't ramp up to max speed (where it feels like you are in a wind tunnel), I suspect that's due to the blower motor resistor failing? (Easy and cheap fix, and technically works and is able to ramp up/down per "stepping").

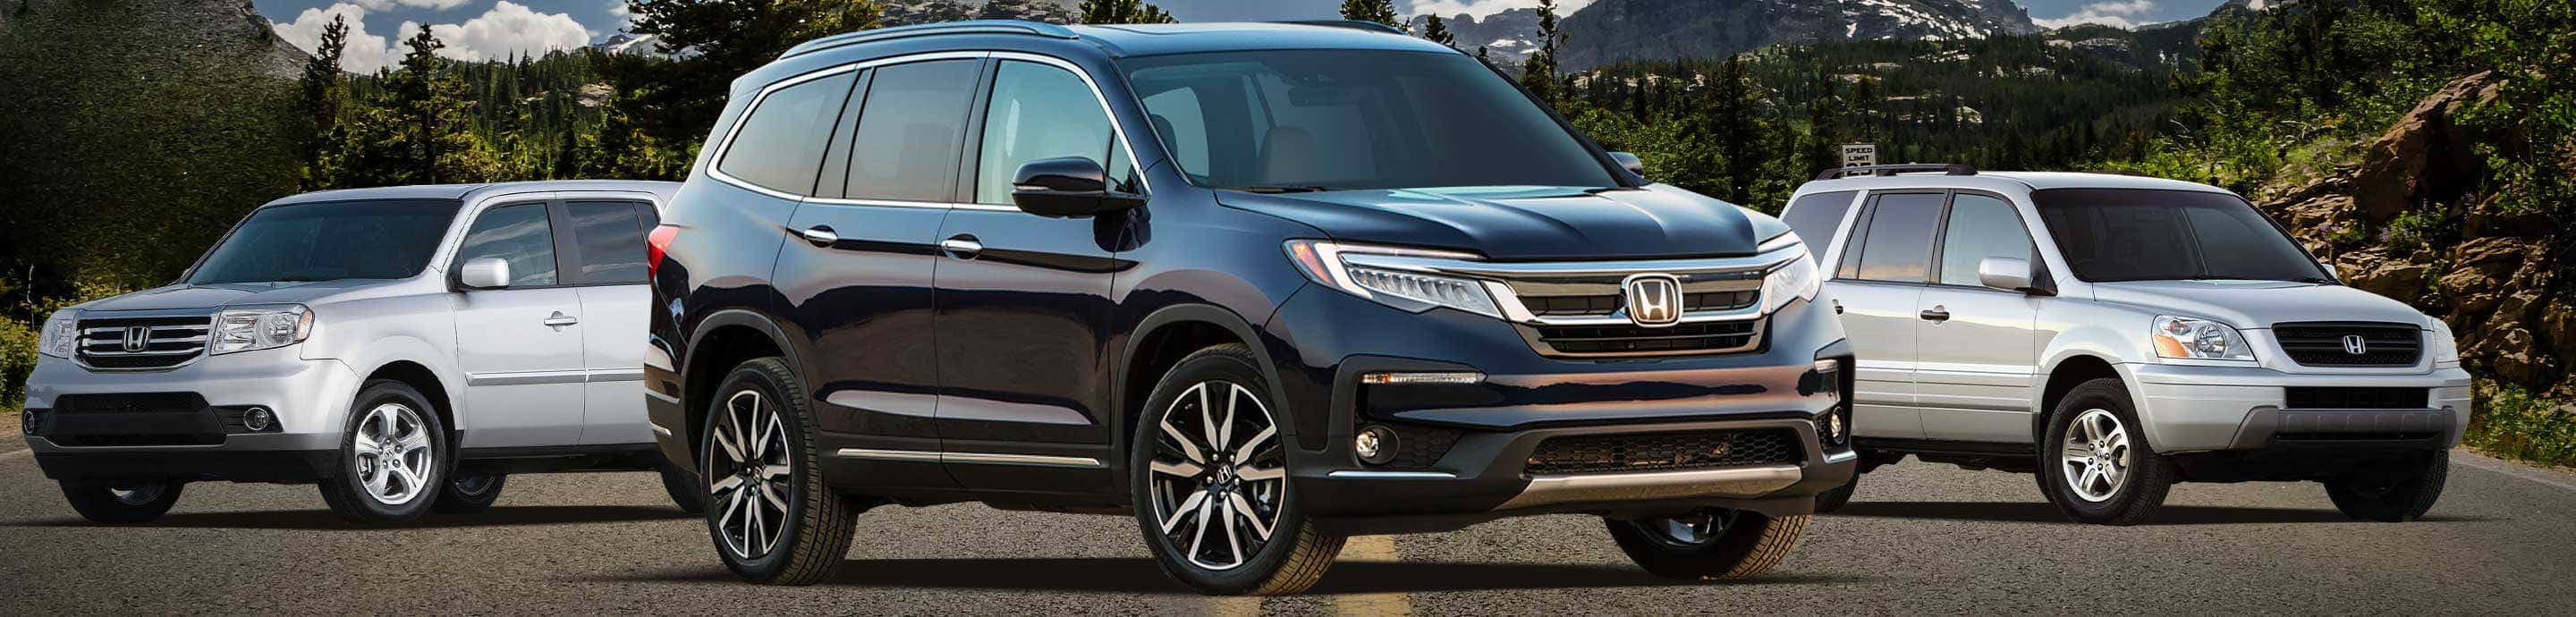
Here's some pictures of our newest edition to our Honda family.


#133 ·
Well managed to do the passenger side lower control arm today. Removal was pretty easy, the day prior I sprayed penetrating lubricant on all the bolts, which made removal a breeze. I also rented a Ball Joint Separator from Autozone. Which made that job easy as well.


Install on the other hand would have anyone in earshot thinking I'm a sailor.

Prior to install, I packed the ball joint with Lucas Red "N" Tacky and got my first experience using a Grease Gun and the Zerks fittings on the Mevotech Ball Joint, which of course made more of a mess than I'd have liked as a result, but better too much grease (that I can wipe away), than not enough.

As for the reason for the Sailors mouth, was not realizing the proper order to install the bolts in. First you want to install the bolt on the rear compliance bushing, where the bolt goes in through the bottom. Second you want to do to the ball joint, and then put the castle nut on loosely. Third you want to do the front compliance bushing. Do it any other order and you won't be able to get the rear compliance bushing bolt to thread from the bottom.

After my "learning experience" and the pains of which order to do them in, I then tightened everything up, put the wheel back on, and took it for a test drive around the block. Noticed while the car tracked straight, the steering wheel had a slight bank to the passenger side in order to drive straight. When I got back, had about 2 hours of daylight left, but then couldn't for the life of me find the damn wheel lock key. After practically going crazy searching for the damn thing, and it wasn't until after the sun had set, that I had the thought "I didn't leave the key in the wheel by accident before my test drive did I?", and decided to walk up my street scanning the road with a flashlight looking for the wheel lock key. About 20ft away from the stop-sign at the end of the street, I found it almost in the middle of the road. Yep, I'm the smartest dumb person I know, and will never be so nonchalant with that wheel key again. (First time owning a vehicle with them).

As additional punishment for not getting the work done on both sides (and to error on the side of caution), I'm driving the wife to work to her graveyard shift here shortly, and will be picking her up at 6am, and will be doing the driver side lower control arm (with the wisdom gained today) tomorrow when I get off at work, which will give me about 2.5 hours to do it before the sun sets.
 
#135 ·
Great job on the control arms! Besides the toe show the HF jack stands caught my attention. There is an active recall for those jack stands so check out the thread.
 
#134 ·
Kudos on a good job. (y)


Except.. are you working under a vehicle with open toe sandals? Anybody got the OSHA anonymous whistleblower hotline number handy? :D
 
#136 ·
Kudos on a good job. (y)

Except.. are you working under a vehicle with open toe sandals? Anybody got the OSHA anonymous whistleblower hotline number handy? :D
Thank you. Never really thought about footwear, considering I was sitting on the ground Indian style while working, my feet/legs really weren't under the vehicle all that much. As I work in IT, I don't really have any work boots, and my other shoes wouldn't offer much more protection than the slippers. If I was working under the hood, or where tools could potentially fall on my feet, would consider better shoes, but for the task at hand the risk/requirement factor is extremely low IMO. Will consider getting myself a set of steel toed shoes next time I go shoe shopping.

Great job on the control arms! Besides the toe show the HF jack stands caught my attention. There is an active recall for those jack stands so check out the thread.
One down, one to go. As for the jack stands (good looking out (y)), one of my former roommates left the recalled ones behind, so took them to Harbor Freight, and paid the extra $10 or whatever for each set to get them replaced with new ones under the recall. As they are the 6 ton replacements, they are exempt from the 2nd recall which only affected the 3 ton replacements, so good on that front. You'll also notice I put the wheel I removed under the side-rail of the vehicle, so if there was an issue with the jack-stand, would fall on that first. I also had wheel chocks under the rear tires too in case the parking brake failed.
 
#137 · (Edited)
So after work today, tackled the driver side lower control arm, removal wasn't as easy this time around, as the rear compliance bushing was in pretty poor shape, and I got the joyful sound of metal on metal screeching taking the bolt out (probably could have hit it with more penetrating lubricant).

Cotter Pin & Castle Nut Loosened:

Below is the tool I rented from AutoZone, made separating the ball joint from the knuckle easy, and took more effort given the sag from the bad compliance bushing. Didn't have a 22mm wrench, so the good old adjustable wrench did the trick.

Lower Control Arm Removed:

Freshly packed ball joint:


I also noticed on both sides doing this job, that the lower boot for the front sway bar links are torn, so guess I'll be back under there in the future to replace those with some Mevotech Supreme's as well.


After completing both sides, took it for a test drive, and steering wheel was much more straight than before, but when centered wants to drift left very slightly, so will be taking it in for an alignment tomorrow. Overall the smoothness/comfort of the vehicle has increased dramatically, and it seems that the shudder during medium braking has gone away. Now I can tell there may be some warping with the rotors, but nothing terrible and suspect that shudder I felt was a resonance frequency being amplified by the play in side to side forces due to those bad rear compliance bushings, which then feeds back into the brake rotors and be partly to blame for the warping of the rotors. Not sure what the shop hours would be for this job, but it took me about 5 hours for both using only hand tools (for the want of an electric ratchet... maybe Black Friday will be the day of spoils).
 
#138 ·
Realized that I didn't snap any photo's of the new Mevotech Supreme LCA's installed, here's a picture of them from this morning after the first 30 miles of driving.

Driver Side LCA

Passenger Side LCA


All that's left is to clean/wipe up some excess grease, and bring the vehicle to Firestone this afternoon to get the alignment squared away.
 
#139 ·
Just got done taking the vehicle in for an alignment at Firestone, and the Toe was way out.


However even after the alignment, the steering wheel still has a slight bank to the right in order to drive straight, so I don't think they properly aligned the steering wheel when they did the alignment. I think this is because they didn't turn on the vehicle to pressurize the power steering system, and properly center it with it on. I've also had a similar experience with my Fit, and had to have them redo it a second time. So this weekend will be visiting a different Firestone nearby, and see if they will let me ensure the wheel is perfectly centered and then check/fix the alignment.

As for Caster, not sure as to the variance. I know on the CarFax there was damage reported (but not necessarily an accident) on the Passenger Side front, but that was when it only had about 60k miles on it.

Could the Struts/Springs be getting old/worn and cause the variance? Before I replaced the LCA's the wheel was perfectly centered, and tracked true although the driver side tire had uneven wear, primarily on the inside edge (like a camber issue).
 
#140 ·
#142 ·
When I first bought one of those tire sprays, I was under the illusion that the effect would last weeks or months. It didn't. Haven't bothered since.

I have since noticed this product has a successful following on used car lots.
141109
 
#143 ·
one of the first things I did on my Pilot (used 07) was replacing the front strut assemblies AND complete pad & rotor job up front. after an alignment it rode great but nothing lasts forever right because the original steering rack and PS pump and tie rod ends are still there and will create some noise and slop eventually. I will definitely have to do my LCA, maybe next year. I had the passenger side cv shaft boot split and slung grease out everywhere underneath... that was a fun job, watch out for those boots keep your eye on them and catch the cracking early. also save up for some new o2 sensors as they will likely start failing over the next couple years. looking forward to the audio install.
 
  • Like
Reactions: cloudasc and aggrex
#144 ·
watch out for those boots keep your eye on them and catch the cracking early
You can keep them soft and supple to prolong their life by treating them to an occasional special spritz.

[Trigger Warning: The following video contains both Scotty Kilmer and AT-205! 🤪 ]

 
#147 ·
Or she got dinged in the rear and is a bit embarrassed. :D
 
#152 · (Edited)
So decided to pull the trigger on upgrading the stereo in the Pilot. Today was mainly reconnaissance for the front doors, where I will be mounting the crossover, and figuring out what modifications will be required to replace the front speakers and add tweeters to the sail panels. Figured while I have the door panels off, should take the time to add some sound deadening material (which I've never done on any of my vehicles). So today, that's exactly what I did.

First step was removing the door panel..


Peeled back the vapor barrier, and this is what I was greeted with... As noticed previously, the plastic exterior side panel for the door doesn't haven't a great seal, and now can see where water has gotten through the clip holes due to washing the vehicle.


Here is after applying the Kilmat Sound Deadening to the inside of exterior door panel, which took about an hour to do:


Here is where I plan on mounting the Crossover that came with my Infinity Reference 6530cx, already confirmed the panel goes on perfectly with it in that location.


I've also confirmed my tweeter location/mount in the sail panel doesn't conflict with anything, just need to swing by Home-Depot and find a 1-9/16" (40mm) drill bit to tap the sail panels.


Tomorrow will be tackling the sound insulation on the driver side door, and preparing the wiring harness to replace the factory radio with a Pioneer AVH-W4500NEX. Speaker install won't be completed until Monday, as I am waiting on a Speaker Harness Kit to arrive since I noticed there isn't much slack with the stock wires, am not a fan of traditional "butt connectors", so this should provide a much more elegant way of extending those wires to the crossover than hacking off the factory plugs.

Stay tuned, there is still more to come, such as...
1. Installing the Pioneer AVH-W4500NEX using a Crux SWRHN-62D to retain the steering wheel controls, using the Metra 95-7861 Dash Kit
1. Replacing Factory 10" Woofer with an Infinity Reference 1000S (and adding more Kilmat Sound Deadening)
2. Wiring an Alpine MRV-M500 to power the sub (I actually ordered an MRV-M250, but there was an MRV-M500 in the box, so free upgrade). Just gonna have to dial the power back to not blow the sub.
3. Adding a License Plate Backup Camera
4. Replacing the factory XM antenna with a SiriusXM SXV300v1 in the stock location. (This means dropping the headliner)
5. Running a set of Composite Cables from the back of the Pioneer to the Inputs on the aftermarket Rear Entertainment System (which also means dropping the headliner, that while dropped plan on adding some Siless 157 mil Closed Foam Insulation to help keep the vehicle cooler on sunny days, and improve the effectiveness of the HVAC system, whether cooling or heating).
6. Thinking about getting a Pi4 and hiding it somewhere and using the HDMI input on the Pioneer as the screen, that can then be controlled with a Portable Bluetooth Keyboard/Mouse combo.
 
#153 ·
Ambitious and well thought out. (y)

I remember having great fun building a monster 8-speaker sound system in my "camping" van (see my signature). When I drove it up to an uninhabited lakeside camping spot, I'd open the side doors facing the lake, canoe out to the middle, and the classic rock I blasted from it made the whole lake a mega party zone.

Later, when parked near some homeless shelters downtown (also literally one block from police headquarters), it got broken into and stripped of its audio and camping equipment. After that, my zeal dampened for investing time and money into a top end sound system for a vehicle.
 
#154 ·
Very intrested in the sound deadening material you used (Kill Mat). I never got around to doing. But now since seeing your install of this product, a buytal backed rubberized membrane, it confirms my suspicions that it is the same product as window seal tape that you can buy at a building supply house.
141875

This may be a little less expensive than what you bought. It comes in 2 different widths.
Thanks for the great photos!
 
#158 · (Edited)
Just finished adding the Kilmat Sound Deadening to the Driver's door. Took about an hour or so as well. Managed to fit in a bit more material than the passenger side. Here is the driver side with the panel off:

Backside of panel:

The factory Alpine 4ohm Speaker, and Basket:

Here is after application:


Now the driver's door make a nice solid thud sound when I close it as well.

In regards to audio quality, when I test drove the vehicle last night on my way to Home Depot and back, noticed the passenger side seemed louder, and the mids definitely were more pronounced. The tone of the lower mid-bass stuff is also different, less "boomy" I'd say. Will need to go for a test drive here in a little bit, and see how things seem with both sides balanced.

Unfortunately, the drill bit selection for home-depot didn't have a proper drill bit size so best I was able to get was 1.5", which is a tad over a mm too small, so will need to chase that with a sanding attachment on my dremel to enlarge the hole slightly to mount them.
 
#162 ·
alright I can't wait to check out what happens with the pi4 install /geek_status/
I recently setup pihole on my home network with a pi-zero wifi model - so simple its great
 
#164 · (Edited)
Been distracted the last few days, pondering how I would power up and down the Pi4 gracefully. Hooking it directly up to Accessory 12V source is a recipe for disaster, and corrupting the SD Card. So after some thinking, decided I'm going to use a ATtiny85 for the task. Goal is to trigger an interrupt on the Pi to power it on, and use that same interrupt to "shut down". Will be using a Transitor for that. As for detecting voltage, will be using a voltage divider to reduce the 11-17V input down to under 5V. Both the ATtiny85 and Pi4 would have constant access to constant power (12+V stepped down to 5V). The ATtiny85 circuit is expected to suck less than 1mah, and while the Pi is asleep it's power usage is about .5mah. Goal is also to have the ATtiny85 being running the equivalent of "Ping" & "Pong" over a serial connection to the Pi as well, to detect when it's awake/powered up, and also pass voltage readings to the Pi as well.

Got some spare time today, and decided to start working on replacing the front speakers.

First step, drilled a 1.5" hole into the Sail panel for each side:

Then enlarged the hole with a sandpaper bit on my dremel to fit the mounting plate.

Completed the passenger side first:

Front of both sail panels:

Backs of each sail panel:

Crimped on Fork Spade connectors for the Crossover:

Here you can see the Scosche speaker connectors, soldered directly to the speaker wire, and heatshrunk, and the gold plated spade connectors I used for connections to the speakers.

A picture of both crossover's, and their wiring

Taking things to the next level with Tesa tape:


Plan is tomorrow when the wife get's home from work, gonna pop off the door panels, and complete the install of the front speakers.

Took the time also today to poke my head under the driver side dash to try and see what options I have for passing the power supply wire for the future amp into the cabin. Looks like I'm just going to follow the main harness, and when it comes to the firewall, likely just going to poke a small hole in the factory grommet (to the side of the main bundle), and force the wire through it. Then I'll have that run behind the center console, and down the side of it under the carpet on the passenger side, to under the passenger seat.

As for the rest of the system, probably going to take advantage of my day's off this Thanksgiving, and use those to prepare the sub, backup camera, and install the deck. Only things that will be left afterwards (if everything goes to plan) will be running the wire for the Mic to the inside of the front dome light housing (same place as factory if you have a model that came with Nav), replacing the SiriusXM antenna (factory location), and running a set of component cables to the RES from the new deck, which all require the headliner to be dropped (which I'll also be adding some closed-foam insulation/sound deadening as well).
 
#167 · (Edited)
So today I finally tackled the actual install of the front door speakers. I've gotten really good/fast at removing the door panels, takes me about 3 minutes or less to remove/disconnect everything for each one. Never installed components like this before, or taken as much time to pay attention to detail (which was primarily a factor of limited money/experience), so underestimated how long it would take do everything, but overall super pleased with the result, and recommend anyone running factory speakers to consider upgrading to these Infinity Reference's.

Here is with the cross-over hooked up (though that's not exactly the spot I mounted it, refer to previous picture where it's under the fiber mat on the actual plastic door panel itself, held on with velcro.)

Add some sound deadening to the speaker cups:


Here are some pictures with the woofer mounted:


Here is the tweeter removed from the factory bracket:

Here you can see the Capacitor acting as a high-pass filter for the factory tweeter.

Here is with everything buttoned up on the driver side (and a picture of my completely stock 09 Manual Fit Sport [GE8] with around 88k trouble-free miles in the background that loves to take corners, and has no problem hauling ass on inclines, and making BMW drivers feel emasculated as I zip by at 80mph in my econo-box :cool:)


Of course, took it out for a test drive, and the difference in overall sound quality, and volume is huge. The mids/bass has improved so much, I can feel the low notes they produce through the seat. Also high pitched sounds are more pronounced, and details/subtleties in the music are more apparent than previously. Also overall volume of the system is increased significantly. Before I could find myself turning the stereo up to 35 or more. Now anywhere from 25-30 provides more than adequate volume. The "sweet spot" on the deck for Bass is +1, and Treble +1. I also shifted the Front to Rear sound to be more Centered (as it was +2 Fronts before). Overall very pleased with the outcome of the install so far. Can't wait to pop out that factory subwoofer, and sound-deaden that cavity as I upgrade it, since it's a noticeable source of distortion/rattle presently.

Thanks to Covid, not going to be really celebrating Thanksgiving, so that gives me all of Thursday, Friday, and Saturday to tackle the majority of the other things (weather cooperating).
 
#168 · (Edited)
Spent some time today working on the stereo upgrade, focused on sound deadening the subwoofer cavity.

Here is before I started pulling everything apart, and after doing a quick carpet cleaning. Used some Turtle-Wax spray foam carpet cleaner, then hit it with my White Beast Brush attachment on my drill.

As they added the rear airbags in 2006+, the removal of that quarter panel is slightly different, and you need to remove the Pillar covers. Also for some reason, Honda decided to use one-time clips for those, where to get them to unlock, have to hit the area with a rubber mallet, and subsequently replace (guess I'll be making a trip to Honda once I'm ready to button everything back up).
142333

After finally getting the back cover off:


Subwoofer removed:

The inside of the subwoofer/fender cavity (Towards the Hatch):

The inside of the subwoofer/fender cavity (Looking Down):

The inside of the subwoofer/fender cavity (Looking towards the front of the vehicle):

And here you can see the XM Computer mounted on the inside of the fender.


After applying sound deadening.


Still need to remove the factory XM computer, and then coat the inside of that panel with more sound deadening. I also plan on lining the inside of the interior panel to cut back on vibrations and don't think there is much benefit to applying butyl deadening to the wheel well, as when I knock on it, there is no reverb, so the closed-foam insulation I have might be a better choice. Will see how much of it I have left after dropping the headliner, and doing the roof.
 
#170 · (Edited)
Holy hell, what did I sign myself up for 🤣. Spent a good part of today tearing apart the interior on the Pilot. I can't believe pretty much every trim panel (except the doors) needs to come off to remove the pillar covers, which need to be removed in order to drop the headliner, which is further compounded trying to get off thanks to the special one-time clips you need to hit with a mallet to be able to remove.

Here is the inside of the subwoofer cavity (looking towards the front)

Inside of the subwoofer cavity (looking towards the rear)

Inside of the subwoofer cavity (looking down)

Since I'm installing a backup-camera, the rear hatch panel needed to come off, so took the time to line the inside of it with more sound deadening.

Close up of the driver side opening:

Close up of the lock mechanism:

Here is a piece I applied to the lower portion of the hatch.

Applied a piece to what should be the backside of the indention for the license plate area:

Inside the hatch pictures:


Drilled the hole for the backup camera wire (then modified a rubber grommet to fit the hole, and the wire for the camera snugly):

Applied sound deadening to the back of the license plate, and after feeding the backup camera wire through the hole I drilled, secured/sealed in place by a modified rubber grommet (cut out 1/12th of it, so I could slide it over the wire, and have it pinch/seal things well), and the backup camera is finally mounted. Only real downside is it's proximity to the hatch, but there is still enough room to grab the handle with a couple fingers on each side.

After removing the driver side rear cover:

On my quest to remove the headliner, had to remove the aftermarket RES:


The mounting bracket (which those screws secured into a cross-beam in the roof, so the headliner itself was not supporting the weight):
 
#171 · (Edited)
Huzzah, the roof liner finally dropped!

Temporary headliner storage next to our Christmas Tree 😂:

Low and behold, the crap ton of stuff hidden behind the headliner o_O


So in the end, looks like I need to get 8 of those "special" clips for the pillars, and also two of the sun-visor "clips", as when I pushed my screwdriver into the area to release them, broke the tabs :rolleyes:.

Tomorrow (Saturday's) goals:
1. Run to Honda for those aforementioned parts (Since they aren't open on Sunday).
2. Line the roof with insulation & apply sound deadening to the driver side rear quarter, and possibly the wheel wells.
3. Run the backup camera wire harness to the front
4. Extend the RES wiring by a few feet, as the person who installed it "b lined" the wire to the RES, so following the factory harness comes up short now.
5. Run Composite cables from the RES to the passenger footwell, for eventual hookup to the deck
6. Replace the factory XM antenna with the SiriusXM one for use with my new deck & remove the old brain from the subwoofer area.
7. Mount the hands-free mic in the HomeLink box, and run it's wire.
8. Test fit the amplifier under the passenger seat, and if it looks good, remove seat and make all the necessary wire runs:
a. Power from battery
b. Ground connection
c. RCA's
d. Remote Wire
e: Sub Wiring
9. Prepare the wiring harness for the deck

Sunday's Goal
1. Tearing apart the dash and installing the deck with all the trimmings.
 
#172 ·
Wow man, I'm out of breath just scrolling through the pictures.


BTW, the last time I saw my mallet was in the late 1960s.
 
#173 · (Edited)
Spent more time today working on the Pilot, and got the majority of the items on my checklist completed.
1. Instead of running to Honda locally, which would have required ordering the special clips (91561-SJD-003), and they would have been over $5 each, not to mention $5+ for each of the Sun-Visor holders (88217-SDB-A01ZA - Grey), would have come out to around $50+tax & a gallon of gas. So instead placed an order through Bernardi for them, 2 bottles of power steering fluid, a Honda Hat + Honda Official First Aid Kit, which came out to about $80 with free shipping, and no tax. So it's like I got the Hat for free & power steering fluid for free, and even the First Aid Kit discounted as well. 😎

2. Lined the roof with some Kilmat in the "grooves" of the roof, then layered the Siless closed foam insulation on top.


3. Ran the majority of the backup camera harness. As I really didn't feel like cutting another wire to run the backup camera the factory boot, did it the semi-ghetto way, and simply pierced a hole to run the wire on the outside of the boot. Will seal it up with some silicone when done.

6. Removed the factory XM antenna, and completely disassembled it.


Can see here where I added some sound deadener to the cap, mainly to help seal the rubber gasket better.

However the plug on the replacement antenna wouldn't fit through the metal hole, so had to cut the wire, and bust out the soldering iron to repair.


Right before remounting the "upgraded" antenna.

8. Test fit the amp under the passenger seat, looks like it will work great, and will have access to the crossover & gain settings by peering under the front of the seat.


So that leaves the following for tomorrow:
1. Need to tap into the switched power running to the RES to provide the required power for the backup camera.
2. Extend the harness for the RES (perfect time while doing #1).
3. Run Composite cables from the RES to the passenger footwell, for eventual hookup to the deck. (zip-ties for the win)
4. Modify the Home-Link box for the hands-free Mic, and run the wire. (Got to drill a hole big enough to feed the Mic into it)
5. Remove the passenger seat, and run all the required wires for the amp.
6. Prepare the wiring harness for the deck

Guess I'll have to push off the deck install until Monday after work.
 
#174 ·